This guide explains how to complete One Flew in Mouse: PI for Hireincluding how to open the three-digit code door in the Curdsville Nuthouse, solve the piano puzzle, and find every collectible in the level. If you get stuck on the process, this tutorial will cover all the steps along the way.
You can collect all One Flew collectibles in a single run without backtracking, including comics and baseball cards needed for 100% completion.
Make sure you talk to Tammy in the PI Office area to get started Side mission For Nuts before heading to the Curdsville Nuthouse.

PI Mouse for Hiring All Side Jobs Walkthrough (Real Rubber Boot Success)
Complete all 14 side quests in Mouse: PI for Hire to unlock the Real Deal Gumshoe achievement with this complete side quest guide.
How to complete One Flew in Mouse: PI for Hire
Key objectives
-
Open the door for the three-digit code.
-
Fill the inkwell and get the Jar-Head gun.
-
Solve the piano puzzle, find the celebrity and take Gloria's famous photo for Behind the Nuts.
-
Chase Millie.
One Flew Walkthrough (all Curdsville Nuthouse collectibles)
Use the steps below to complete One Flew and collect all items in one run. If you need help with other missions and collectibles, check out our complete Mouse: PI for Hire guide.
All One Flew collectibles
There are seven collectibles in One Flew, including comic books, baseball cards, schematics, and optional clues. The list below shows the full breakdown.
- Comics: 1
- Baseball Cards: 1
- Schemes: 4
- Optional clues: 1
- Total number of collectibles: 7
Unlock the back gate and find your way inside
Go through the gate and defeat the enemies in the sewer area.
How to open the 3 digit code door in Curdsville Nuthouse
The door in the northeast corner of the second sewer room leads to a door that is unlocked with a three-digit code. The correct three-digit code is 4-5-1. Use the levers on the wall to set the code and press the send button to open the door. For more information on this puzzle, check out our One Flew door code guide.
Opening this door is not required for 100% completion.
Now go back to the second sewer room and climb the ramp on the west side. Go through the opening at the top.
Look for anything suspicious
Optional track

Enter the prison area and defeat all the enemies you find there. Climb up the stairs and Wall Jump to reach the open office door. There is an optional clue on the desk in the office.
Shoot the barrel on the ground in the office to destroy the floor. Fall through the hole and flip the switch when you land. Follow the path through the prison and enter the Decontamination Chamber.
Talk to Millie and follow Millie
When the door to the Decontamination Chamber opens, approach Millie and talk to her. Shoot the target above her head and enter the water filled area.
Schematic
Jump into the water and check under the bridges for an opening that will allow you to float into the central structure. Follow the path inside and you'll find a Schematic sitting on a crate.
Swim out of the central structure and back to the bridge at the start of the area. Use Wall Jumps on the platforms the statues hold to cross the area, rotating them by shooting at the targets in the walls. On the last bridge, shoot the target and enter the Warp-Pipe.
Now flip the switch in front of you and cross the bridge. Flip the switch to the left and continue forward to approach Millie. Continue forward.
Talk to the brain? & Go to Inkwell
Schematic

Talk to Jar-Head and take the Schematic from the board in the northwest corner of the room. Then move along the path, flip the switch and drop down to the area where you kick the skeleton onto the surgical table. Access the brain.
How to fill an inkwell
When the fight starts, look in the corners for a surgical table with an active pen. Bring the enemy close to this corner and kick them on the table. Repeat this process until the meeting is complete.
Transfer the ink to the brain chamber, return to your little ruler and pick up the sentient weapon
Head back to the switch you flipped before dropping into the Inkwell area and flip it again. Return to the room where you originally encountered the brain and talk to it. Grab the Jar-Head Pistol from the case that opens.
Go FFF-Forth, talk to Millie again? and stay for Millie
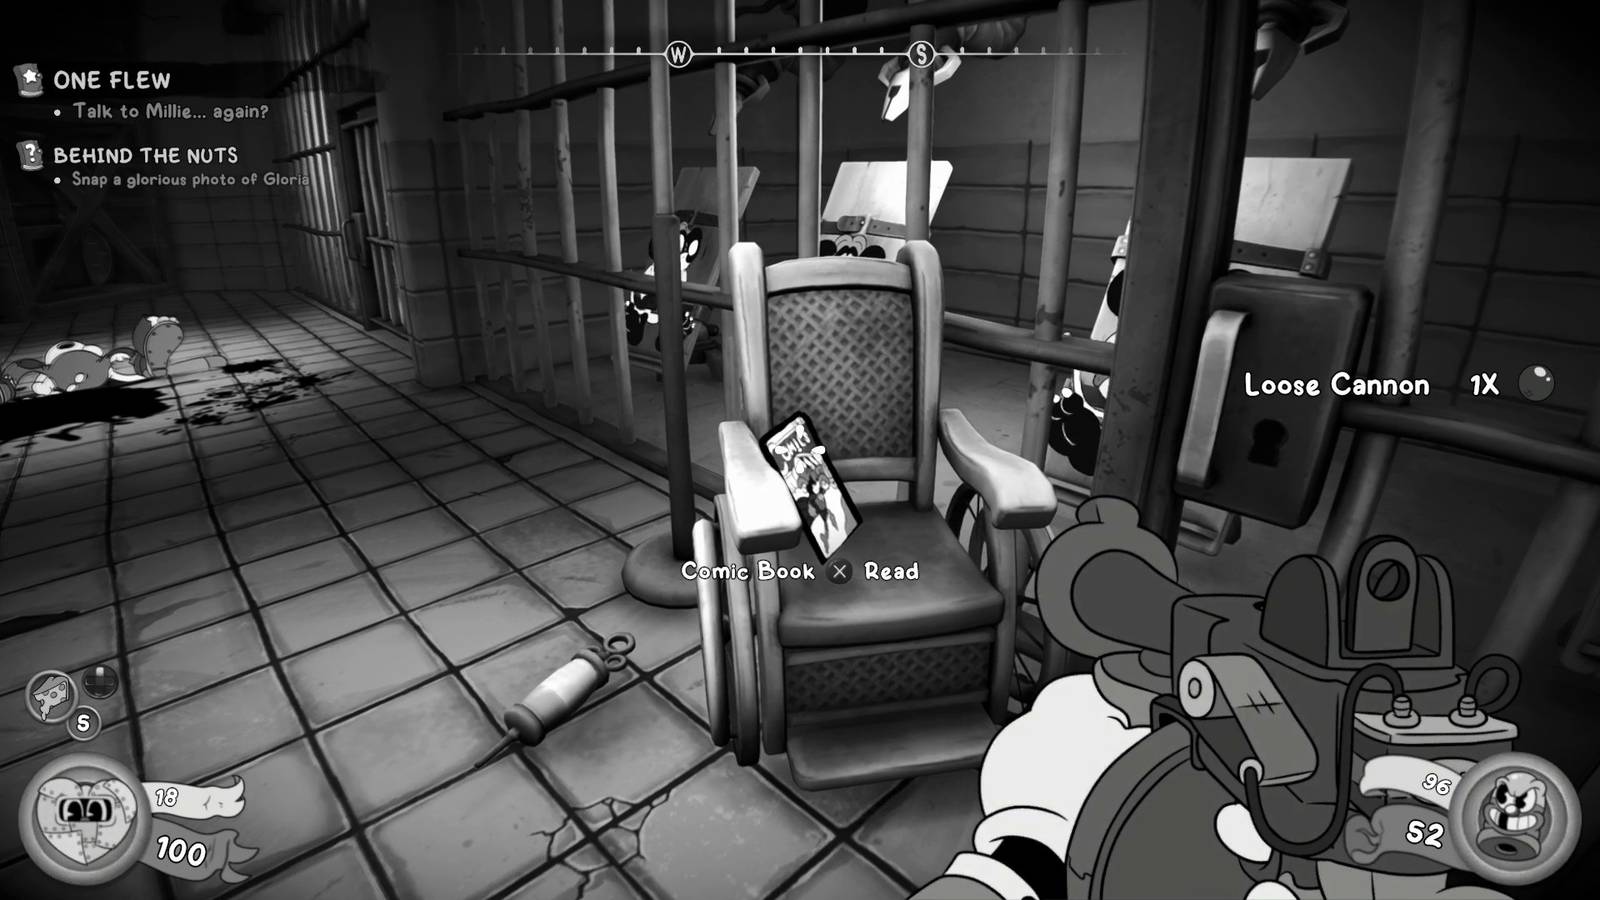
Comic book
Continue forward and go through the Warp-Pipe across from the typewriter. Look through the gate that opens to your right to find a comic in a wheelchair.
Schematic
Now head forward and climb the ladder. In the next area, look for the schematic on top of the crate on the right. Grab it and return to Millie.
Talk to Millie and shoot the target above her head. Cross the bridge and look left to find a piano.
How to solve the piano puzzle in the Curdsville Nuthouse
Approach the piano and press CAGE on its keys. Cross the bridge that is sinking and follow the path to find Gloria in a cell. Take a picture of her. For more information on the piano puzzle, see our walkthrough for the Behind the Nuts side mission.
Keep chasing Millie and shoot the moving birdhouse targets as they appear. Cross the bridge that lowers and proceed to the gate with the button. Press the button to continue forward.
Defeat the enemies in the next room and flip the switch at the bottom to open the gate. Jump on the trampoline around the gate and head to the next switch. Wall jump to cross the gap and go through the laundry room, flip another switch and shoot the target to open the giant washing machines.
Talk to Millie one more time to find the elevator
Baseball card
Exit through the top of the laundry room and enter the Warp-Pipe across from the next typewriter. Go through the gate that opens on your left and jump onto the pipe on the left wall. Jump across the platforms to reach a Warp-Pipe that leads to the next area. Follow the path to the gate at the end and look in the cabinet on the right to find a Baseball Card.
Schematic

Now go back through the Warp-Pipe and talk to Millie. Shoot the target above the gate to your right and continue. On the wooden part of the path, jump onto the railing and jump to the top of the central structure. Here you will find a safe that has a Schematic.
Return to the path and flip the switch to lower the bridge that is used to enter the central structure.
Rise and boldly go where no mouse has gone before
Go inside the structure and enter the elevator in the middle. Flip the switch to ride and go to the portal. Go through it to complete the One Flew mission.
FAQ
How many collectibles are there in the Curdsville Nuthouse?
There are seven collectibles in One Flew: one comic book, one baseball card, four schematics, and one optional clue. There is also an NPC that must be photographed for the Behind the Nuts side job.
Are the Curdsville Nuthouse collectibles unmissable?
After completing One Flew, you cannot return to the Curdsville Nuthouse for any collectibles you missed. However, missed newspapers, comics and baseball cards can be purchased at Nut Soup (PI Office area) or Roadhouses.
More Mouse PI for Rent Collector's Guides

- Released
-
April 16, 2026
- Developers
-
Fumi games
- Publishers
-
PlaySide
- Engine
-
Unity
- Number of players
-
For one player
